Create the first guarded location in your Digital Guard Tour dashboard using the onboarding panel, a clear site name, and Google Maps coordinates.
A site is the guarded physical location where your guards will work, patrol, scan checkpoints, report incidents, and document activity during active shifts.
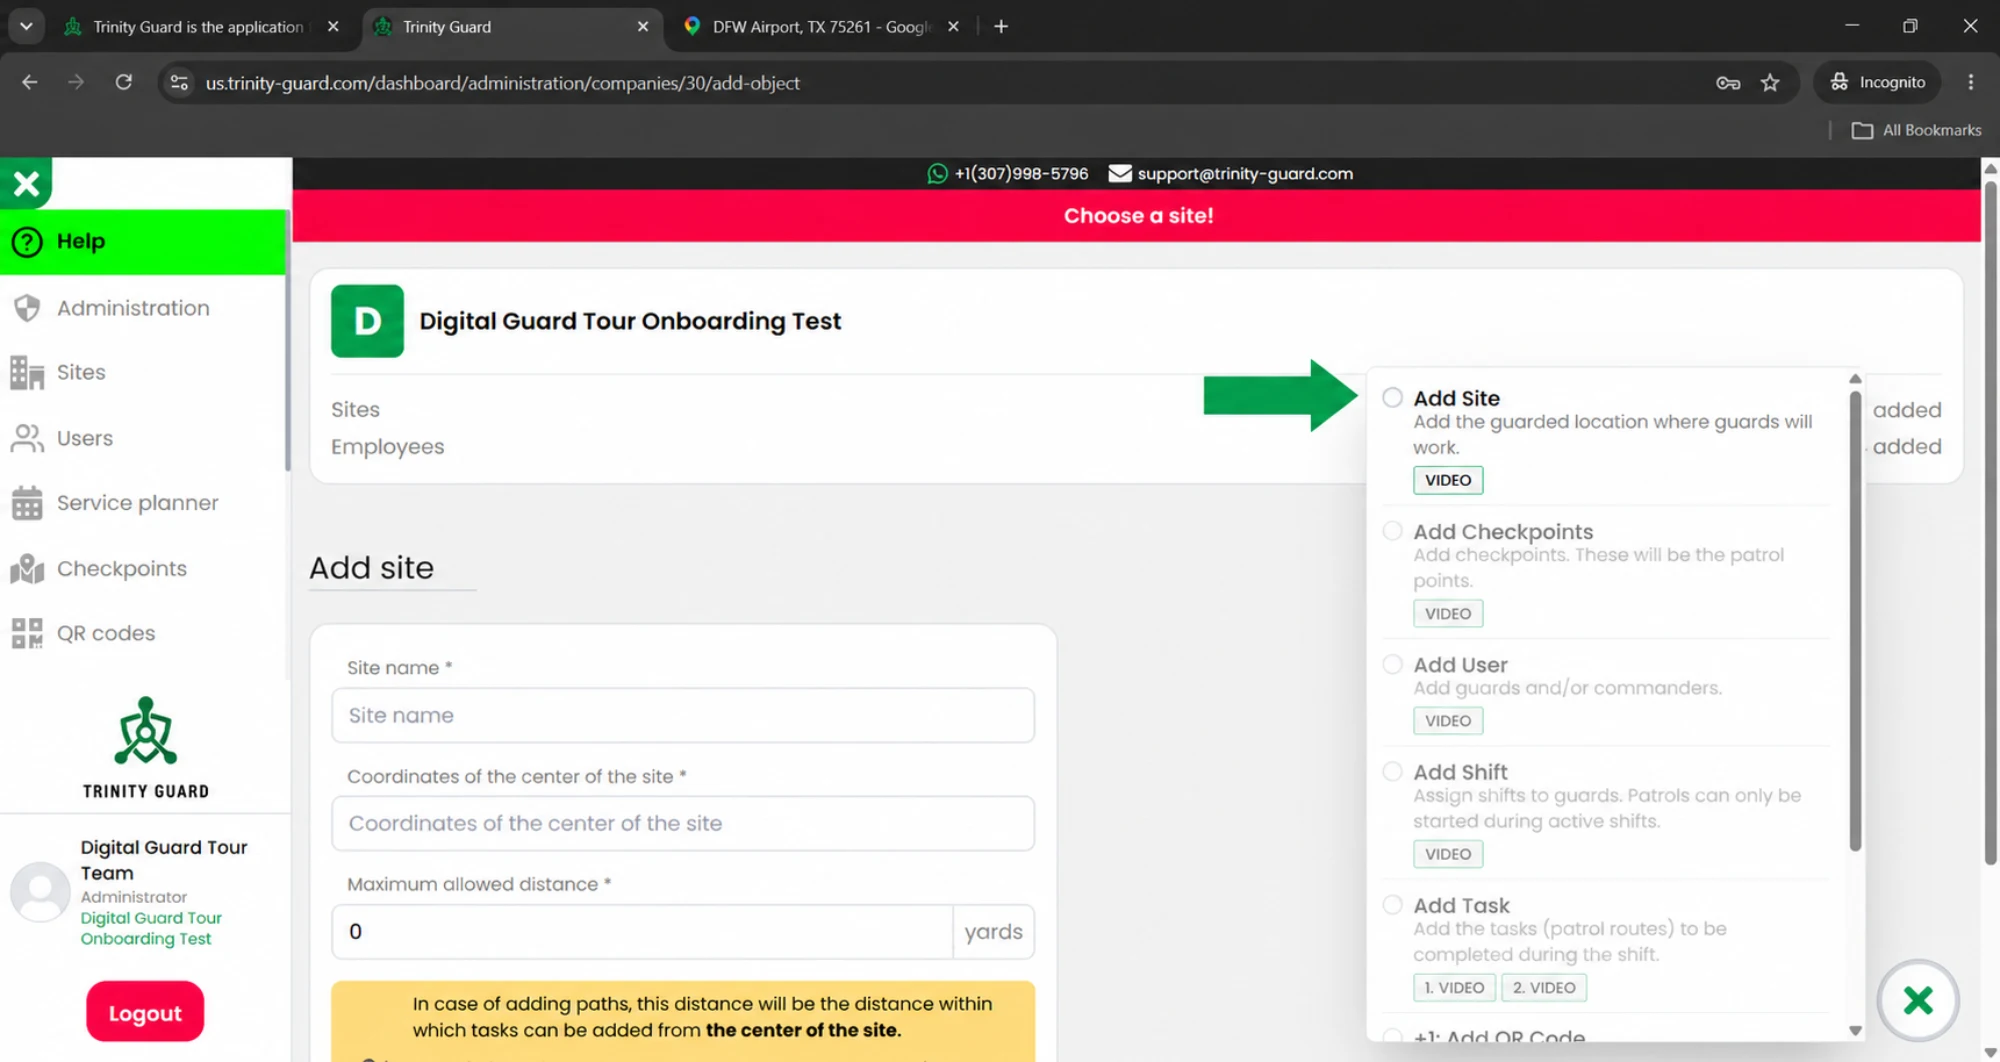
In this setup guide, the site is added through the right-side onboarding panel, not from the left navigation menu. This keeps the first setup process simple and follows the guided workflow that appears after registration.
For the example, we use a professional test location named NorthGate Logistics Site – Dallas, TX. The coordinates are copied from Google Maps and pasted into the Trinity Guard dashboard.
✓Select Add Site from the onboarding checklist.
✓Enter a clear and recognizable site name.
✓Copy the site center coordinates from Google Maps.
✓Use the optional distance limit only when your operation needs it.
Workflow
The Add Site setup path
The first site creates the base location for checkpoints, users, shifts and patrol tasks. After this step is complete, Trinity Guard marks Add Site as completed in the onboarding checklist.
1Select Add SiteUse the onboarding checklist on the right side.
2Enter site nameUse a name supervisors and guards will recognize.
3Find coordinatesRight-click the location in Google Maps.
4Paste coordinatesAdd the site center point to the dashboard.
5Save siteCreate the site and continue to checkpoints.
Interactive walkthrough
How to add a site step by step
Follow the actual onboarding flow used inside the Trinity Guard dashboard. Click any step to view the related screen.
In the onboarding panel on the right side of the dashboard, select Add Site. This opens the Add site form where the first guarded location can be created.
Detailed guide
Create the first guarded site
1
Use the onboarding panel
After registration, the onboarding checklist appears on the right side of the dashboard. Select Add Site there to start creating the first guarded location.
This guide intentionally uses the onboarding panel, because that is the cleanest path for a first-time setup.
2
Enter the site name
In the Site name field, enter a clear and professional name for the guarded location.
Example site name: NorthGate Logistics Site – Dallas, TX
Use a name that supervisors, guards and administrators can easily recognize later in the dashboard.
3
Find the site center in Google Maps
Open Google Maps and search for the location you want to use as the center of the site.
For this example, search for DFW Airport, TX 75261.
Right-click on the exact point you want to use. Google Maps displays the latitude and longitude coordinates at the top of the context menu.
4
Copy and paste the coordinates
Left-click the coordinate line in Google Maps. The coordinates are copied automatically.
Return to Trinity Guard and paste them into the Coordinates of the center of the site field.
Example coordinates: 32.903674817169495, -97.04718916942804
5
Use the optional distance limit only when needed
The Maximum allowed distance field is optional. It can limit how far patrol routes or checkpoints can be added from the center point of the site.
For example, entering 500 yards means patrol points must stay within that distance from the site center.
If you do not want to apply a distance limit, enter 0. In that case, the system does not restrict the distance.
6
Click Add Site
After entering the site name, coordinates and optional distance limit, click Add Site.
Trinity Guard displays a confirmation window showing that the site has been added successfully.
7
Review the Sites list and continue setup
The new site now appears in the Sites list. At the same time, the onboarding panel marks Add Site as completed.
The next recommended onboarding step is Add Checkpoints, where you create the patrol points for this site.
US terminology note: in Digital Guard Tour setup guides, the guarded location is called a site. This is the standard U.S. security operations term for a warehouse, office building, factory, logistics yard, hospital, residential property or any other guarded location.
Best practice
Use a real site name and a practical center point
A site name should be easy to understand during daily operations. Avoid vague names like “Test 1” or “Building A” unless those are already used by your team internally.
The coordinate should represent the practical center of the guarded location. For a logistics yard or industrial site, choose a point near the operational center of the facility, not a random road or parking area outside the property.
✓Use a site name that matches how supervisors and guards talk about the location.
✓Copy coordinates from Google Maps instead of typing them manually.
✓Use 0 for the distance limit when you do not want to restrict the setup area.
✓Continue directly to Add Checkpoints after the first site is created.
FAQ
Add Site questions
What is a site in Trinity Guard?
A site is the guarded physical location where guards work. It can be a warehouse, factory, office building, logistics yard, hospital, residential property, construction site or any other location that needs patrol verification.
Do I have to use the left sidebar to add the first site?
No. During onboarding, the recommended path is to use the onboarding panel on the right side of the dashboard. Select Add Site there and follow the guided setup flow.
Where do I get the site coordinates?
Open Google Maps, search for the location, right-click the selected point and click the coordinate line shown at the top of the menu. Google Maps copies the latitude and longitude automatically.
Is the maximum allowed distance required?
No. The maximum allowed distance is optional. Use it only if you want to limit how far checkpoints or patrol points can be added from the site center. Enter 0 if you do not want to apply a distance restriction.
What happens after the site is created?
The site appears in the Sites list and the onboarding panel marks Add Site as completed. The next recommended step is to add checkpoints for patrol verification.
Next step
Your first site is ready for checkpoints
After the site is created, continue with the onboarding checklist and add the first checkpoints. These patrol points will become the locations guards verify during patrol tasks.
Gyula GyörfiSecurity technology expert, veteran police commander, and founder of Trinity Guard LLC. This setup guide is based on the real Trinity Guard onboarding flow used after a new company registration.
Privacy
Cookie settings
Analytics only with consent
DigitalGuardTour.com uses essential cookies and similar technologies
to operate this website, remember your choice, and help protect forms from spam or abuse.
Optional analytics starts only if you allow it.
Essential operation
Required for basic site functionality, remembering your cookie choice,
and form security. This cannot be turned off.
Always active
Site analytics
Helps us understand which pages are visited, what devices are used,
and how visitors find the website. This is enabled only with your consent.