Setup Guide 2026 · Add Shift

How to Add a Shift in Trinity Guard®

Learn how to add a working shift for a guard in Trinity Guard® so patrol tasks can be started during an active duty period.

A shift defines when a guard is on duty. Add the user first, then create the shift, and only after that add the patrol task.
Quick expert summary

Add the shift before you create patrol tasks

In Trinity Guard®, a shift is the working time window assigned to a specific guard. It tells the system when that guard is expected to be on duty and when patrol tasks can be started.

The setup order matters. First, the company adds the site. Then checkpoints are created. After that, a user is added. The shift comes after the user, because the shift must be connected to a real guard account.

In this guide, the shift is created for John Barrymore at the NorthGate Logistics Site – Dallas, TX test environment. The shift starts at 07:00 and ends at 19:00, creating a 12-hour working period.

After the shift is saved, it appears in the Service planner calendar. The next onboarding step is Add Task, where the actual patrol task or route is created.

  • Open the Add Shift step from the onboarding checklist.
  • Confirm the selected guard before creating the shift.
  • Enter the shift start and end time.
  • Save the shift and confirm it in the Service planner.
Workflow

The correct Add Shift setup path

The Add Shift step belongs after Add User in the onboarding flow. This is important because a shift cannot be assigned to a guard who does not exist yet.

1Select Add ShiftUse the onboarding checklist after the Add User step is completed.
2Open the empty shift formThe system opens the Add Shift screen connected to the selected guard.
3Enter shift timesAdd the shift start date/time and the end of shift date/time.
4Click Add ShiftSave the guard’s working period.
5Review success messageConfirm that the shift was saved successfully.
6Review plannerConfirm the shift in the Service planner calendar view.
7Confirm onboardingMake sure Add Shift is checked before moving to Add Task.
Interactive walkthrough

How to add a shift step by step

Follow the real onboarding flow inside the Trinity Guard dashboard. Click any step to view the related screen.

Trinity Guard® setup guide screenshot showing the Add Shift onboarding step highlighted after Add User.

Step 1: Select Add Shift in the onboarding panel

After the user has been added, the onboarding checklist shows Add Shift as the next operational setup step. Click Add Shift to create the guard’s working time window.

Detailed guide

Create the first guard shift

1

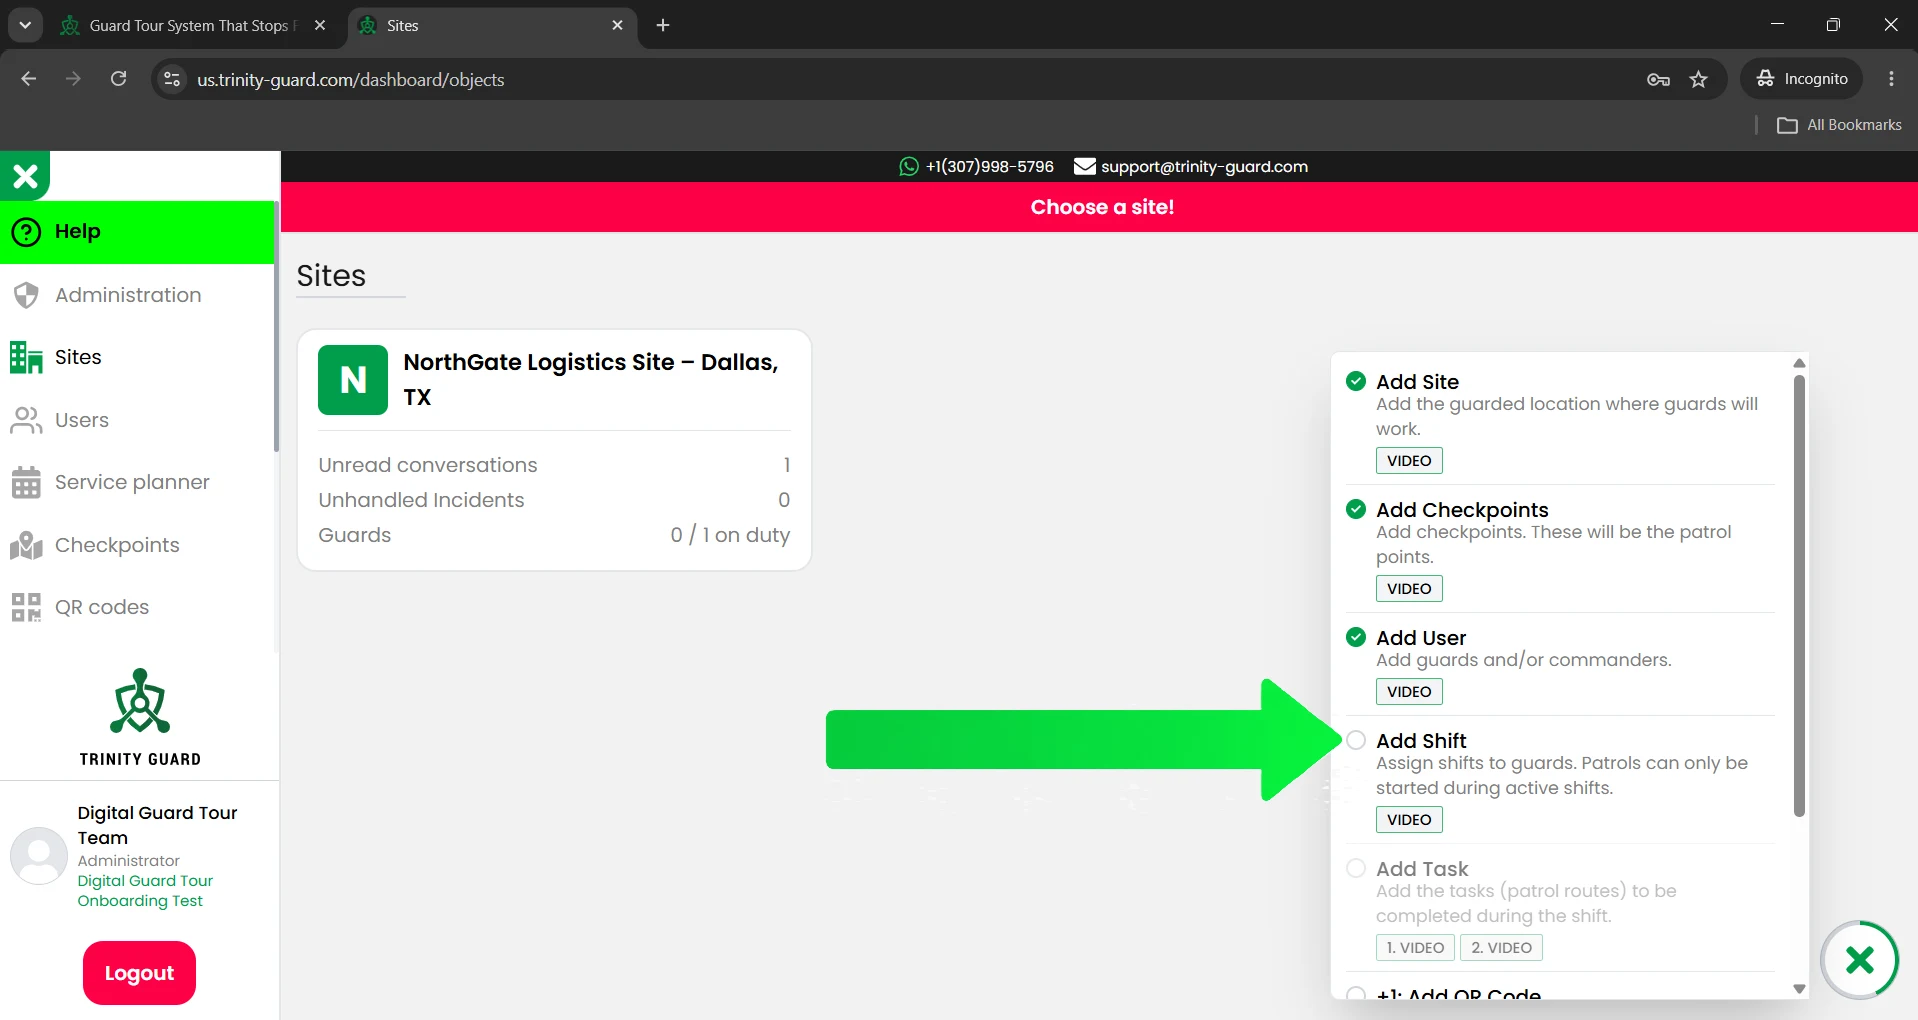
Select Add Shift in the onboarding checklist

After the site, checkpoints, and user are created, the onboarding panel shows the next setup step: Add Shift.

Click Add Shift in the onboarding checklist. This opens the shift creation flow for a guard user.

The order is intentional. A guard must exist before a shift can be assigned, and the shift should exist before patrol tasks are created.

2

Confirm the selected guard

The Add Shift screen opens in the user context. In this example, the shift is being created for John Barrymore, whose role is Guard.

Always check the name at the top of the page before saving the shift. This prevents administrators from assigning a working period to the wrong guard.

The screen also shows the selected period and the number of hours already worked by the guard during that period.

3

Enter the Shift Start time

In the Shift Start field, enter the date and time when the guard’s shift begins.

For this example, the start time is:

2026-06-14 07:00

The shift start time defines when the guard’s active working period begins in the system.

4

Enter the End of Shift time

In the End of Shift field, enter the date and time when the guard’s shift ends.

For this example, the end time is:

2026-06-14 19:00

This creates a 12-hour shift from 07:00 to 19:00. The end time closes the scheduled duty window for that guard.

5

Click Add Shift

After the start and end time are entered, click the green Add Shift button.

The system saves the shift and connects it to the selected guard.

At this point, the guard has a scheduled working period, but patrol tasks still need to be created separately.

6

Review the success message

After the shift is saved, Trinity Guard® shows a confirmation message: Shift added successfully.

The confirmation window gives three practical options: John Barrymore’s Shifts, Add Task, and Close.

For most first-time setups, the best next step is Add Task, because the guard now has an active shift window where patrol tasks can be scheduled.

7

Confirm the shift in the Service planner

Open the Service planner to confirm that the new shift appears in the calendar view.

In this example, the Service planner shows John Barrymore on June 14 from 07:00 – 19:00, with a total of 12 h.

After the shift is visible in the planner, the onboarding checklist marks Add Shift as completed.

Shift setup note: the user account identifies who performs the work. The shift defines when the guard is on duty. The patrol task defines what must be completed during that shift.
Atomic truths

Short operational rules for Add Shift

These statements summarize the logic behind shift setup in Trinity Guard®.

A shift defines the guard’s working time window.
A user must exist before a shift can be assigned.
A patrol task is created after the shift, not before.
Patrol tasks can only be started during active shifts.
The Service planner shows saved shifts in calendar view.
GPS tracking does not run in the background.
Checkpoint order is not enforced by design.
AI verification analyzes context, not speed.
If it’s not verified, it didn’t happen.
Operational logic

Why shifts matter in patrol verification

A shift gives the patrol workflow a clear time structure. Without a shift, the system would not know when the guard is expected to be on duty.

With a shift, administrators can see when the guard should be working, when patrol tasks should be completed, and whether activity happened inside the expected working period.

Trinity Guard® separates scheduling from patrol verification. The shift defines the working window. The patrol task defines the required activity. The checkpoint confirms the guard reached the required location. The report provides operational proof.

This structure helps security companies build cleaner documentation, stronger accountability, and better client-facing proof of patrol activity.

Common mistakes

Common Add Shift mistakes to avoid

  • Do not create patrol tasks before adding a shift. A task needs a working period where it can be completed.
  • Do not assign the shift to the wrong guard. Always check the guard name before saving.
  • Do not forget the end time. A shift needs both a start and an end time.
  • Do not confuse Service planner with patrol task creation. The Service planner shows shifts. Patrol tasks are added after the shift is created.
FAQ

Add Shift questions

What is a shift in Trinity Guard®?

A shift is the scheduled working period of a guard. It defines when the guard is expected to work and when patrol tasks can be started.

Is a shift the same as a patrol task?

No. A shift defines the working time window. A patrol task defines what the guard must complete during that working period.

Can I add a shift before adding a user?

No. A user or guard must exist before a shift can be assigned.

Where do I add a shift?

You can start from the onboarding checklist by clicking Add Shift. The system opens the Add Shift page connected to the selected guard.

What information is required to create a shift?

You need the selected guard, a shift start date/time, and an end of shift date/time.

What happens after I click Add Shift?

The system saves the shift and shows a confirmation message. The shift then appears in the Service planner.

Where can I see the created shift?

You can see the created shift in the Service planner calendar.

Can patrol tasks be started outside an active shift?

No. Patrols are designed to be started during active shifts.

What is the next step after adding a shift?

The next step is to add a task. The task defines the patrol activity that must be completed during the shift.

Why does the onboarding checklist show Add Task after Add Shift?

The task belongs inside a working period. That is why the system guides administrators to create the shift before creating the patrol task.

Next step

Your first guard shift is ready for task setup

After the shift is added, continue with the onboarding checklist and create the first patrol task.

The user account identifies who performs the work. The shift defines when the guard is on duty. The patrol task defines what must be completed during that shift.

Start with one test guard, one clean shift, and one simple patrol task before rolling the system out to the full security team.

Gyula Györfi, security technology expert and founder of Trinity Guard LLC
Gyula Györfi Security technology expert, veteran police commander, and founder of Trinity Guard LLC. This setup guide is based on the real Trinity Guard® Add Shift onboarding flow used after the first site, checkpoints, and guard user are created.