Add users before you build the operational schedule
A user is a person who can access the Trinity Guard® system with a defined role, language, and login credentials. In most security operations, users are added before shifts and patrol tasks are assigned, so the system can connect each patrol activity to the correct guard or commander.
In this setup guide, users are added through the Add User onboarding step or directly from the Users page. The goal is to create a clear, role-based account for each guard, commander, or team member who will use the system.
For this example, we add a guard user for the NorthGate Logistics Site – Dallas, TX test environment. The user receives a name, email address, display language, role type, and temporary password.
A valid email address is important because it allows the user to log in properly and use account recovery later if they forget their password.
✓Open the Add User step from the onboarding checklist.
✓Add a user from the Users page.
✓Enter the user’s name, email address, display language, and role type.
✓Create and confirm a temporary password, then continue to shift setup.
Workflow
The Add User setup path
Adding a user is one of the core setup steps in Trinity Guard®. After a site and checkpoints are created, the next operational step is to add the people who will actually work with the system.
1Select Add UserUse the onboarding checklist on the right side of the dashboard.
2Open Users pageThe Users page shows existing users and the Add user button.
3Click Add userStart creating a new guard, commander, or operational user.
4Enter user detailsAdd the name, email address, language, and role type.
5Set temporary passwordEnter the temporary password twice to confirm it.
6Save the userClick Add User to create the account.
7Continue setupGo back to users, add a shift, or close the confirmation window.
Interactive walkthrough
How to add a user step by step
Follow the actual onboarding flow used inside the Trinity Guard dashboard. Click any step to view the related screen.
us.trinity-guard.com/dashboard/users
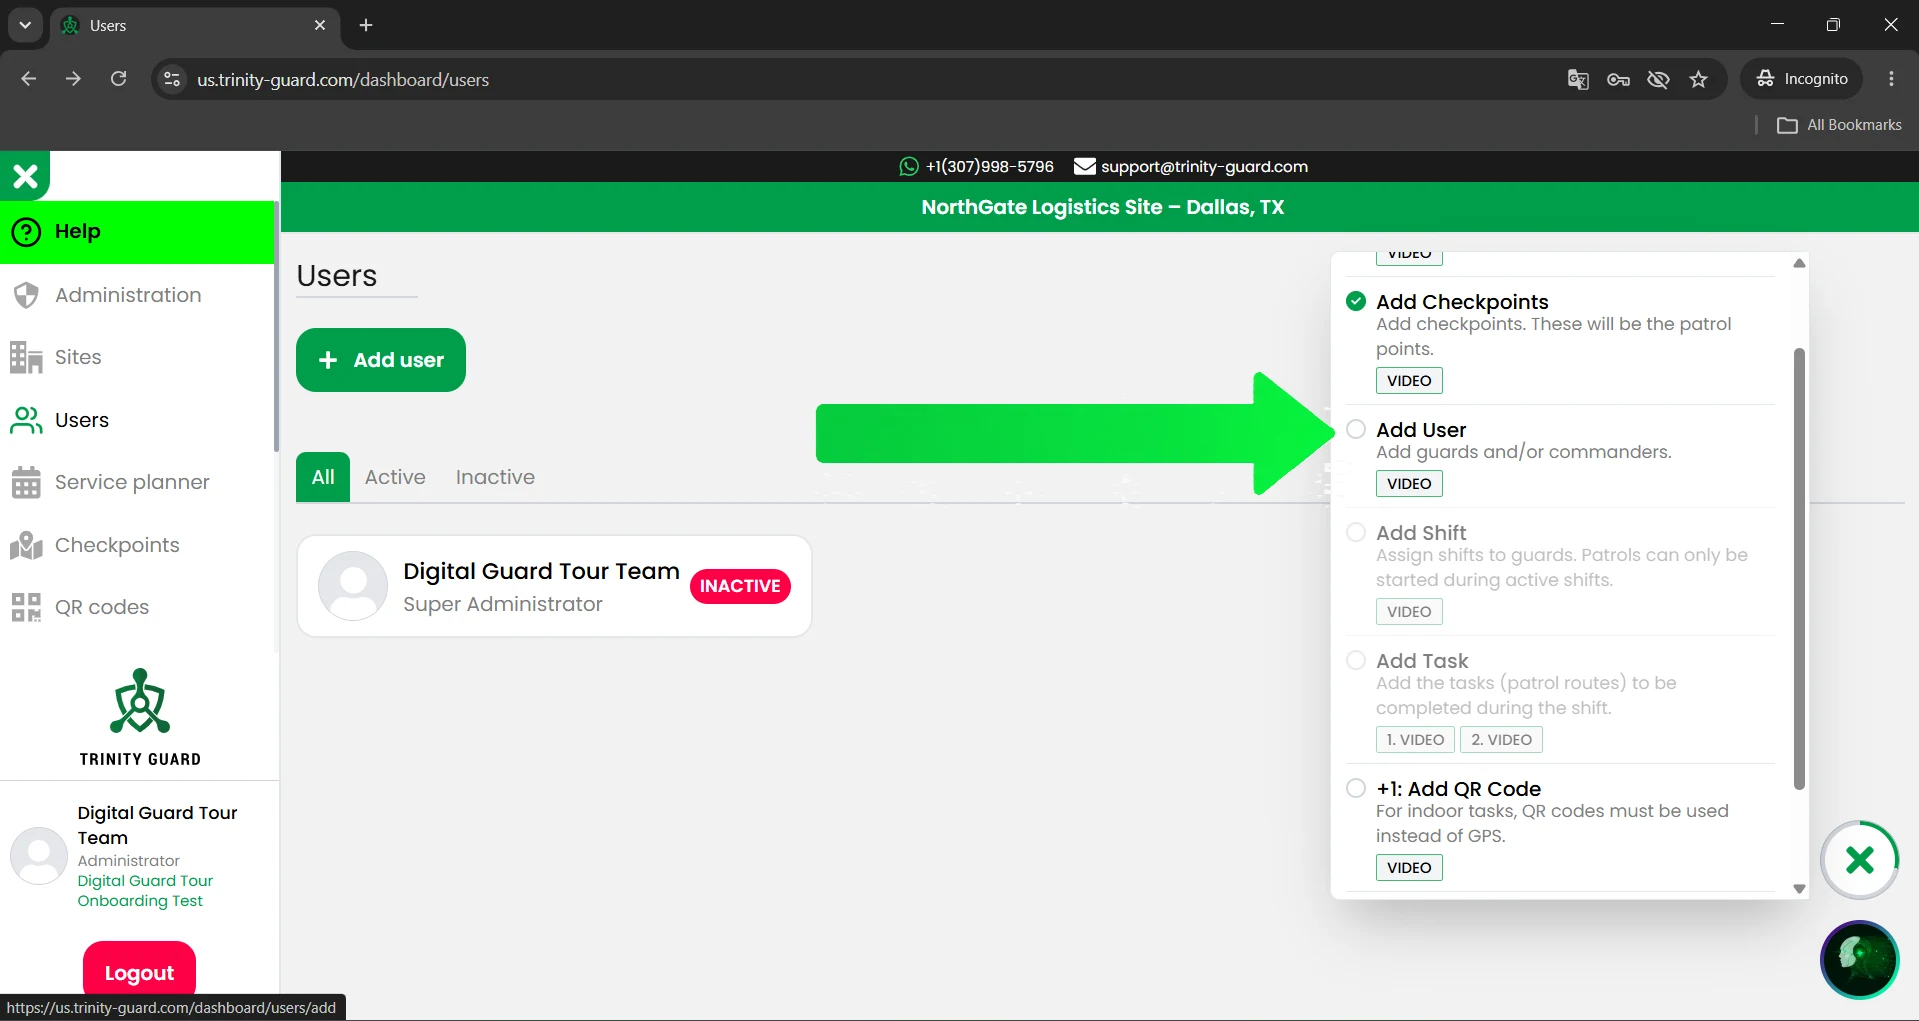
Step 1: Select Add User in the onboarding panel
After the site and checkpoints are created, the onboarding panel shows the next setup step: Add User. Click Add User in the onboarding checklist to start adding a guard or commander.
Detailed guide
Create the first guard user
1
Select Add User in the onboarding panel
After the site and checkpoints are created, the onboarding panel shows the next setup step: Add User.
Click Add User in the onboarding checklist to continue. This step is used to add guards or commanders to the selected site environment.
The onboarding panel helps keep the setup process structured. Instead of jumping between menus manually, the panel guides the administrator through the main configuration steps in the correct order.
2
Open the Users page and click Add user
The Users page shows the existing accounts connected to the company environment.
Click the green Add user button to create a new user account.
This is where administrators can add guards, commanders, or other operational users depending on how the company wants to manage patrol verification.
3
Enter the user’s name, email, language, and type
Fill in the basic user information.
Use the person’s real name so reports and patrol activity can be clearly connected to the correct user.
Enter a valid email address. This is important for login, communication, and future password recovery.
Choose the user’s language. In this example, the selected language is English.
Then select the user type. For a guard who will complete patrol tasks in the mobile app, choose Guard.
4
Add and confirm the temporary password
Enter a temporary password for the new user.
Then enter the same password again in the confirmation field.
The temporary password should be simple enough to communicate during onboarding, but it should not be a permanent shared password. After the user receives access, the company should manage credentials according to its internal security policy.
5
Click Add User
After all required fields are completed, click the green Add User button.
The system then creates the user account and connects it to the company environment.
At this point, the user has been added to Trinity Guard®, but the user still needs a shift and patrol tasks before they can perform structured patrol verification work.
6
Review the success message
After the user is created, Trinity Guard® shows a confirmation message: User added successfully.
The confirmation window gives three practical options: Back to users, Add shift, and Close.
For most first-time setups, the best next step is Add shift, because a guard needs an active shift before patrol tasks can be started.
7
Confirm the Add User onboarding step
After the user is added, return to the onboarding checklist.
The Add User step can now be marked as complete, and the setup can continue with Add Shift.
This confirms that the system now has at least one active user who can later be assigned to work schedules and patrol tasks.
User setup note: the user account identifies who performs the work. The shift defines when the guard is on duty. The patrol task defines what must be completed during that shift.
Best practice
User setup for security teams
User setup is not just an administrative form. It affects reporting, accountability, patrol verification, and commander review.
Each guard should have an individual user account. Avoid using one shared account for multiple guards, because shared accounts make it difficult to prove who completed a patrol, who missed a task, or who submitted an incident report.
A properly added user helps commanders understand who was responsible for each patrol action, when it happened, and whether the task was completed as expected.
✓One account per guard.
✓One valid email address per user.
✓Correct role type for each person.
✓Clear display language for each user.
✓Shift assignment after the user is created.
Operational recommendations
Practical recommendations before assigning shifts
Use real names, not nicknames, when adding users.
Use email addresses that the company or the user can access.
Select the correct role type from the beginning.
Do not create unnecessary admin-level users for normal guards.
Add users before creating or assigning shifts.
After adding a user, continue directly to shift setup if you are building the first live patrol workflow.
FAQ
Add User questions
What is a user in Trinity Guard®?
A user is a person who can access the Trinity Guard® system with a defined role, language, and login credentials. Users can be guards, commanders, administrators, or other operational roles depending on the company setup.
When should I add users during setup?
Add users after the site and checkpoint setup, but before assigning shifts and patrol tasks. This allows the system to connect each shift and patrol activity to the correct person.
Why is the email address important?
The email address is used for account access and can help with password recovery later. A real, accessible email address is better than a fake or temporary email.
What user type should I choose for a guard?
For a person who will complete patrol tasks in the mobile app, choose Guard.
Can I add commanders too?
Yes. Trinity Guard® can support commanders as part of the operational setup. Guards complete patrol work, while commanders can help manage and review operations depending on the company’s workflow.
Why does the system ask for a temporary password twice?
The second password field confirms that the temporary password was typed correctly. This helps prevent login problems caused by typing mistakes.
What should I do after adding the first user?
The next recommended step is to add a shift. A guard needs an active shift before patrol tasks can be started.
Should multiple guards use the same account?
No. Each guard should have an individual account. Shared accounts reduce accountability and make patrol reports less reliable.
Can the user language be changed?
The language setting is selected during user creation. Use the language that best fits the user’s daily work environment.
Does adding a user automatically assign patrol tasks?
No. Adding a user creates the account. Shifts and patrol tasks must still be assigned separately.
Next step
Your first guard user is ready for shift setup
After the user is added, continue with the onboarding checklist and create the first shift.
The user account identifies who performs the work. The shift defines when the guard is on duty. The patrol task defines what must be completed during that shift.
Start with one clean test user, assign a shift, and run a short pilot before rolling the system out to the full security team.
Gyula GyörfiSecurity technology expert, veteran police commander, and founder of Trinity Guard LLC. This setup guide is based on the real Trinity Guard® user creation flow used during the onboarding process after the first site and checkpoints are created.
Privacy
Cookie settings
Analytics only with consent
DigitalGuardTour.com uses essential cookies and similar technologies
to operate this website, remember your choice, and help protect forms from spam or abuse.
Optional analytics starts only if you allow it.
Essential operation
Required for basic site functionality, remembering your cookie choice,
and form security. This cannot be turned off.
Always active
Site analytics
Helps us understand which pages are visited, what devices are used,
and how visitors find the website. This is enabled only with your consent.