Open the Add Checkpoints step from the onboarding panel
After your first site has been created, the onboarding panel shows the next setup step: Add Checkpoints.
Click Add Checkpoints in the onboarding panel to continue the setup process.
Create your first checkpoint template, place checkpoints on the map, use Satellite view for better accuracy, and confirm that the setup step is complete.
In this setup guide, checkpoints are added through the Add Checkpoints onboarding step, directly on the map. The goal is not to drop as many points as possible — it is to mark the exact locations where patrol verification actually matters, so every checkpoint represents a real security control point.
For this example, we build a route named NorthGate Logistics Patrol Checkpoints and place four checkpoints on the map. Use Satellite view to position them accurately against real gates, doors, and parking areas, then save the template so it is ready for patrol tasks.
The checkpoint template creates the map-based patrol points for a selected site. After this step is complete, Trinity Guard marks Add Checkpoints as completed in the onboarding checklist.
Follow the actual onboarding flow used inside the Trinity Guard dashboard. Click any step to view the related screen.
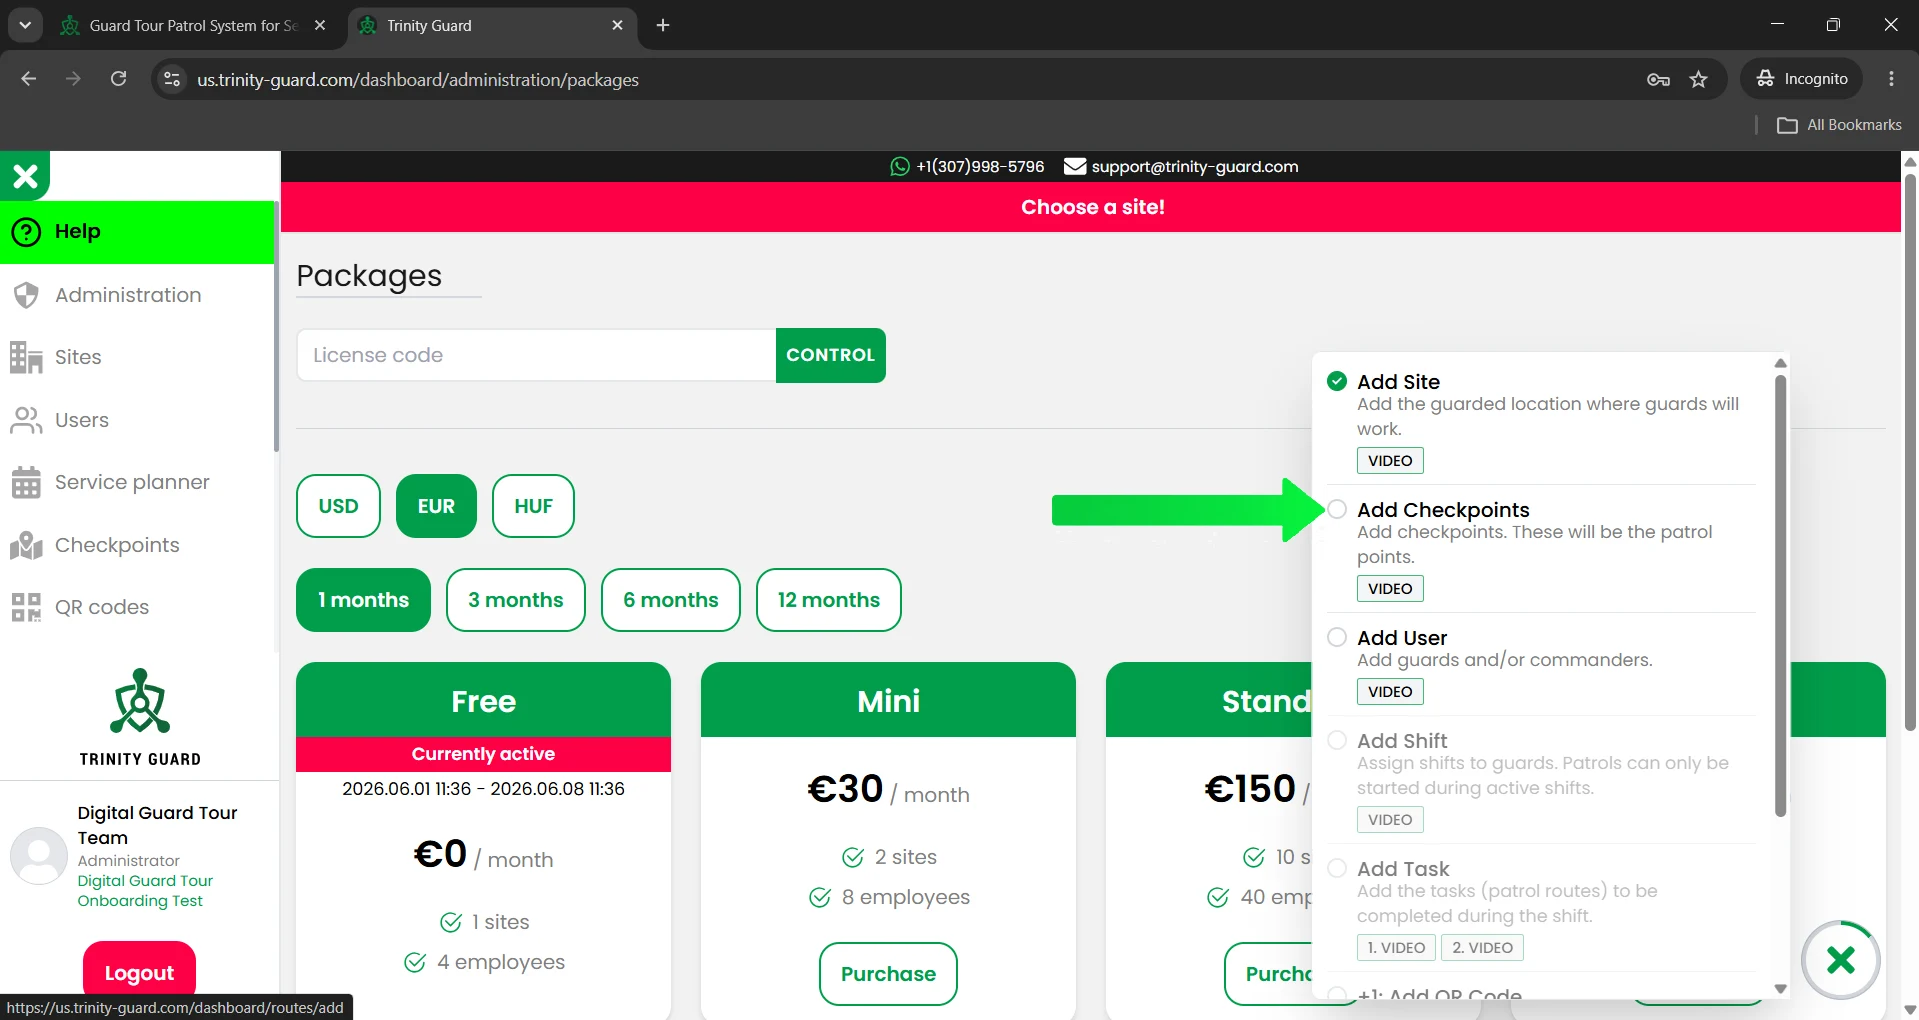
After your first site has been created, the onboarding panel shows the next setup step: Add Checkpoints. Click Add Checkpoints in the onboarding panel to continue the setup process.
After your first site has been created, the onboarding panel shows the next setup step: Add Checkpoints.
Click Add Checkpoints in the onboarding panel to continue the setup process.
After you click Add Checkpoints in the onboarding panel, Trinity Guard automatically opens the Checkpoints page.
From this page, you can start creating a new checkpoint template for the selected site.
Click Add checkpoints to begin.
Enter a clear checkpoint template name.
Example template name: NorthGate Logistics Patrol Checkpoints
Use a name that makes the route easy to recognize later. The checkpoint template name is not the name of one checkpoint. It is the name of the full checkpoint set or patrol route template.
After naming the checkpoint template, add checkpoints on the map.
Left-click on the map to place each checkpoint. Each click creates a new checkpoint. The system numbers the points so you can see the route order clearly.
In this example, the patrol route contains four checkpoints.
Map view is useful for general orientation, but Satellite view can help you place checkpoints more accurately.
Use Satellite view when you need to see buildings, gates, parking areas, driveways, fences, loading areas, or patrol paths more clearly.
After all checkpoints have been placed on the map, save the completed checkpoint template.
The template should be saved after the checkpoints are added, not before.
When the save is successful, Trinity Guard shows a confirmation message: The template was saved successfully!
After the template is saved, the checkpoint template appears on the Checkpoints page.
The onboarding panel also marks the Add Checkpoints step as completed.
From this screen, you can also edit the route later if you need to change, add, or remove checkpoints.
Place checkpoints where patrol verification matters most.
For outdoor patrols, use clear physical locations such as gates, building corners, parking areas, loading docks, fence lines, and entrance roads.
For indoor patrols, use QR-based checkpoints near doors, corridors, reception areas, storage rooms, mechanical rooms, stairways, or sensitive access points.
A checkpoint template is a saved set of patrol checkpoint locations for a selected site. It defines the physical points that guards may need to visit during patrol tasks.
No. A checkpoint template defines where the patrol points are located. A patrol task defines when and how those points are used during a shift.
Yes. You can add checkpoints by left-clicking on the map inside the checkpoint route editor.
Satellite view helps you place checkpoints more accurately because you can see real buildings, gates, roads, parking areas, and site features.
Yes. After the checkpoint template is saved, you can open the saved template and edit the route if you need to change the checkpoint locations.
Yes. The checkpoint numbers help show the order of the patrol points inside the route.
Use a clear name that identifies the site or patrol area, such as NorthGate Logistics Patrol Checkpoints, Main Gate Patrol Checkpoints, or Warehouse Exterior Patrol Checkpoints.
Save the checkpoint template after you have added the checkpoints on the map and checked that the route is correct.
After the checkpoint template is created, continue with the onboarding checklist and build your first patrol task. The checkpoint template defines the patrol locations, while the task defines when guards must complete them.